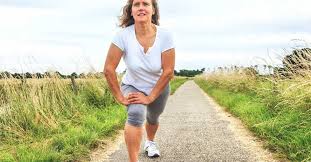
Antenatal Exercise and Postnatal exercise
Table of Contents
What is Antenatal exercise?
~antenatal exercises are the exercises prescribed during the pregnancy by the physiotherapists.
~thsese exercises helps expectant mothers to gain knowledge on how to look after themselves during pregnancy.
~antenatal exercises provides many benefits to the pregnant mother if the exercises are performed correctly under the guidance of the physiotherapist and gynaecologists.
~Antenatal exercise aims at preventing low back pain and enhancing physical and psychological preparation for delivery by means of joint stretching and muscle strengthening. – Tighten the vaginal, urethral and anal muscles as if trying to withhold urination or defecation.
Benefits of Antenatal exercise:-
~fatigue,nausea,constipation,back pain and swelling of extremities reduced.
~less insomnia,stress,anxiety,and depression.
~better mental health and emotional well-being.
~reduction of the length of the labor and decrease in delivery complications.
~maintenance or improvement of fitness.
~possible prevention of gestational diabetes mellitus.
Purposes of antenatal exercise:-
~antental exercise aims at preventing low back pain and enhancing physical and psychological preparation for delivery by means of joint stretching and strengthening.
Guidelines for antenatal exercise:-
~breathe smoothly,work gradually,according to your capability.
~work twice or thrice a day and repeat each movements ten times in every session.
~antenatal exercise may begin when pregnancy reaches 16-20 weeks.
~physiotherapist may modifications to the exercise according to your physical conditions.
Types of antenatal exercise:
~sit on a chair with your back against the seatback.
~tighten the vaginal,urethral and anal muscles as if trying to withhold urination or defecation.you can also do this exercise in a standing position.
~pelvic floor exercise enhances the control and support of pelvic floor muscles.it helps you prepare for childbirth and prevents uterine prolapse,urinary incontinence and haemorrhoid.
*protect your pelvic floor:-make a habit of pulling up your pelvic floor before you lift,carry,push or pull light to moderate weights.
~lift and squeeze as you cough or sneeze.
~dont hold your breathe.
~sit with your knee apart.
*Prevent backache:-
~bad posture,stretched tummy muscles and a growing baby can lead to backache during pregnancy.overstretched tummy muscles can contribute to back pain and constipation.
~good posture:-
~stand tall
~bottom tucked in
~tummy-in always
~relaxed knees
~pelvic floor up
*Simple ways of caring of your body :-
*DO’S:-
~rest as open as you can with your feet up slightly higher than the level of your hips.
~to get out of bed, draw your tummy in, keep knees together ,roll on your side and push up on your arms.
~do some exercise every day.
~walk briskly for 20-30 minutes.
~swimming
*Dont’s:-
~do not stand still or sit for long periods.
~do not stoop. when lifting ,you should bend yours knees,keep your back straight and pull up your pelvic floor as you take the weight of the object.
~do not lift or carry heavyweights.
2. Back and abdominal exercise:-
~sit on a chair with your back against the seatback
~breathe naturally
~tighten the abdomen and then press pelvis downwards the flatten your low back against the seatback,hold for 5 seconds and relax.
~this exercise helps you by correcting the low back and pelvic posture .it strengthens your abdominal muscles and prevents back pain.
3. Ankle exercise:-
~sit on a chair with your back against the seatback.
~start with one ankle and turn the foot upwards and downwards.each up and down movement is counted as one time. repeat ten times.
~rotate the ankle to draw an inward and outward circle. each circular movement is counted as one time. repeat ten times.
~repeat the same steps at the other ankle.
~ankle exercise help reduce leg swelling and varicose vein ,thus alleviating the problem of leg cramps.
4. lower limb relaxation exercise:–
~this exercise enhances the flexibility and strength of inner thighs and pelvic muscles.it helps you get accustomed to the delivery position and prevent thigh spasm during delivery.
~sit on a stable low chair against a wall and spread your thighs sideways.hold for 5 seconds and relax.
~note:-it is suitable for pregnant women with tight thighs.
~do not pull apart the thighs.
~please note that this exercise is not suitable for those with pain over the pubic bones.
5. Breathing exercise:-
~breathing techniques for pain relief during labour. exhale before inhale is suggested.
*Abdominal breathing:-
~suitable for mild pain.
~breathe in through the nose and feel abdomen expand.then breathe out through the mouth.
*Lower costal breathing:-
~suitable for medium pain.
~puts your hands on the lower rib cage.
breathe in through the nose and feel your chest expand.then breathe out lightly through the mouth.
*Apical breathing:-
~suitable for severe pain.
~cross your hands below the clavicles with your mouth slightly open.breathe in through the nose and the mouth.breathe out lightly as if trying to flicker the flame of a candle without blowing it out,and feel the upper lungs moving slightly up and down.
~during contractions,try to relax and control your breathing.
~in between contractions,rest and relax as much as you can in most comfortable position.
*Abdominal muscle exercises:-(natures perfect corset)
~you have 4 pairs of muscles arranged in 4 layers.
~the rectus abdominals,transverse abdominals,internal and external oblique muscles.
~thsese muscles work together to hold your spine firm,tilt your pelvis upward and to pull your tummy in tight. these muscles bend and twist your spine.
~during pregnancy your tummy muscles will soften,separate and lengthen to accommodate your growing baby.
~this is a natural change due to pregnancy hormones circulating in your body. the gap will gradually close after birth.
~you need to do abdominal exercises to prevent overstretching and encourage closure of the separation after birth.
*Abdominal muscle exercises:-
~pelvic tilt:-
~perform a posterior pelvic tilt,keep back straight ,isometrically tighten the abdominal muscles.


Contraindications of Antenatal exercise:
~severe anemia
~dizziness of faintness
~headache or visual disturbances
~unexplained abdominal pain.
~vaginal bleeding
~decreased fetal movement
~amniotic fluid leakage
~elevated pulse or blood pressure
~fatigue, palpitation, chest pain
~warning:-if you have pain or any discomfort during exercises, slow down or stop the exercises and consult your doctor.
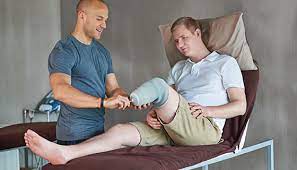
Post-natal exercise:
Postnatal exercises:- improving posture and balance. Our series of postnatal exercises are designed to help you get back in shape after having your baby. Here you can learn three simple exercises that are designed to work your core muscles as well as the rest of your body.
POSTNATAL PHYSIOTHERAPY FOLLOWING CESAREAN SECTION:-
*First-day postnatal exercises:-
- Breathing exercises.-Huffing with a pillow held over the wound.
- Foot and leg exercises are performed to assist circulation.
- Teach mother how to move about and to roll onto the side to get in and out of bed.
- Feeding the baby in the bed- have a pillow under the thighs to -prevent sliding down and an extra pillow under the knee on the -side of feeding.
*Second-day postnatal exercises:-
- Add pelvic floor exercises.
- Straight abdominal exercises.
- Pelvic tilting.
- Continue deep Breathing exercises.
- Standing, stretch tall, tighten buttocks.
- Walk tall to prevent backache.
*Subsequent days:-
- Progress postnatal exercises along the same lines as for the -vaginal delivery.
- Stitches are generally out by 7 days.
- Abdominal contractions are very important to maintain mobility of the healing tissue as well as increasing circulation to
- promote healing.
*Aerobic exercises:
- Give yourself sufficient time to heal, particularly if you have had a caesarean birth.
- Consult with your doctor or midwife before starting any postnatal exercises – you may be advised to wait, or adapt your exercises.
- If you are having trouble with the techniques required in the above postnatal exercises, please consult a physiotherapist, exercise physiologist or other appropriately qualified and certified fitness professional.
- Aim for slow, gradual weight loss of around half a kilogram per week.
- Wear a supportive bra.
- Avoid any activities that place stress on the unstable pelvic floor and hip joints until strength and stability has improved. Be careful about activities that require sudden changes in direction (for example, high impact aerobics, running and contact sports). This varies depending on the type of pregnancy and delivery you may have had.
- Initially, perform postnatal exercises for only five to 10 minutes at a time. Increase the length of your workouts gradually.
- Ideally, your postnatal exercises session should eventually last between 30 and 50 minutes.
- Drink plenty of water before, during and after exercise.
- Don’t push yourself too hard – if you feel breathless, slow down.
- If you experience pain, slow down or stop postnatal exercises. Remember that it may take you months to return to your pre-pregnancy shape and weight, so don’t be discouraged by slow progress.
*Pelvic floor muscles:-
~Its is important to start pelvic floor exercises or post-pregnancy exercises within 6 hours of the delivery to regain the strength of these stretched muscles as soon as possible. The contraction may be felt only around the anus.
~Encourage the mother to practice the contraction 4-5 times at frequent intervals throughout the day. The mother may be afraid to try because of the lochia (post-delivery discharge) or pain of stitches.
~Postnatal exercises will increase the circulation, promoting healing and removing inflammatory exudate which will in turn relieve pain because muscles have been stretched it is important to tighten and relax slowly.
~The number of contraction should be increased to 50 per day in small group of five at a time and linked to a daily activity, e.g. when washing hands, feeding baby. Interferential therapy is very useful in re-educating the pelvic floor muscles and lower pelvic pain reduction.
*Relief of perineal pain:-
~Sitting is more comfortable on a ring cushion or between folded pillow so that pressure on the perineum is relieved. Side-sitting or side-lying may be tried for breastfeeding prone lying with pillows under the lower legs and the abdomen to relieve pressure on the breast may be restful.
~Ice may be applied as a pack for 4-5 minutes or as an ice cube wrapped in a wet swab moved gentle over the area for 2-3 minutes twice a day. Pulsed electromagnetic energy can be applied to the area at a low intensity for 5- 10 minutes to promote healing. Ultrasound may be applied underwater with the mother in the bath because scar tissue around the vagina can be soften by the effects of the ultrasound.
*Strengthening the abdominal muscles:-
~Immediately after the birth, the muscles are slack, and intra-abdominal pressure is reduced. The women is concerned about 5 months pregnant. With the help of postnatal exercises ,Abdominal muscles may take 6 weeks to return to the pre-pregnant state.
~Diastasis of the rectus abdominis, women lies in crook lying with the lumber spine flattened and the head is lifted to produce an abdominal contraction. Strengthening exercises are:
- Crook lying, Pelvic tilting.
- Crook lying, tighten the abdominal muscles, lift head and shoulder and lower slowly.
- Half crook lying, hip hitching on the side of the straight leg.
- To work the hip extensors which help to maintain the backward/ forward pelvic tilt.
- Prone lying, alternate leg raising and lowering.
- Prone lying, tighten the buttocks, hold for count 10 and rest.
- The abdominal muscles should be contracted released slowly at first and jerking must be avoided.
~Postnatal exercises are important for you to regain the strength of your abdominal muscles, after the birth of your baby as strong muscles help prevent lower back injury, prevent abdominal organs from ” dropping forward” through lack of support and help you to regain a flat stomach.
~You can find your pelvic floor muscles by stopping and starting the flow of urine when you urinate. The squeezing that stops the flow of urine are the pelvic floor muscles contracting.
~Now try contracting and relaxing your Kegel muscles while sitting at your desk, driving in your car and watching Almost every women experience trouble bringing their abdomen back to its original tone and size after childbirth. Postnatal exercises, a combination of Kegel and abdominal exercises will work.
~This change in a most women’s bodies is due to the laxity of the abdominal muscle wall. It is important to remember that your body has simply changed, and not necessarily for the worse. Post-natal exercises can help your abdomen return to its original size.
~The pelvic floor is a “sling” of muscles that supports your internal organs, e.g. your uterus, bladder and kidneys. To keep the pelvic floor (also called the Kegel muscles) strong, you need to exercise them.
~Women commonly experience muscle and joint pain and post-pregnancy pain the following are contributing factors:-
- Weakness of the lower abdominal in both vaginal and cesarean deliveries.
- Long periods spent sitting while feeding the baby can -contribute to tightness in the upper body.
- The presence of the hormone relaxing in the weeks post-delivery and whilst breastfeeding loosens ligaments which are then more -vulnerable to sprains and strains.
- Unaccustomed lifting and bending over cots, car seats, etc.
*BREATHING EXERCISES:
Breathing is an important technique to ease pain and stress. It is best to inhale through the nose and exhale through the mouth. There are three types of breathing:
- Diaphragmatic
breathing, which utilises not only your chest, but your abdomen as
well. It promotes relaxation by decreasing the effects of the
sympathetic nervous system. - Apical breathing, which utilises
only the upper chest, or the apex (the pointed extreme) of the lungs. –
Lateral breathing, in which air is directed into the sides and back of
the ribcage. The ribs expand outward and upward, like the handle of a
bucket. Proper breathing is the easiest way to achieve relaxation. It is
important also to breathe while we exercise since holding our breath
diminishes the oxygen supply to muscles and causes blood pressure to
increase.
*ANKLE AND FOOT EXERCISE:-
This exercise helps improve circulation and can be performed while seated on a chair or on the floor. If seated on the floor, extend one leg out and away from your body.
With your back straight and arms at your sides, extend your toes forward and away from your body as far as you can. From this position, bend your foot back, pointing your toes up to the sky and your heel away from your body.
*STATIC BACK OR PELVIC TILT EXERCISE:-
Lie down on the floor with your knees up / feet flat. In this position, tilt the pelvis so that the curve of the lower back flattens. Hold it in this position for a slow count of 3 and then allow the pelvis to return to it starting position.
Pelvic tilts are often recommended for developing support for the lower back, abdominals, sacroiliac joint, and the adjacent structures. They are great for lower back problems due to poor posture and muscle atrophy, and provide a starting point for spinal stabilisation exercise programs.
*KEGEL EXERCISES:-
Exercise 1 (for strength)
- Step 1: Sit, stand tall or lie on you back with your knees bent and legs comfortably apart.
- Step 2:
Close your eyes, imagine what muscles you would tighten to stop
yourself from passing urine. If you can’t feel a distrinct tightening of
these muscles, ask for some help from a physiotherapist. She will help
you to get started. - Step 3: Now that you can feel your
pelvic floor muscles working, tighten them around your front passage,
vagina and back passage astrongly as possible and hold for three to five
seconds doing this. You should feel your pelvic floor muscles up inside
you and feel a definite let go as the muscles relax. If you can hold
longer (but no more than eight seconds), then do so. Remember squeeze
must stay strong and you should feel a defrinite let go. Repeat up to
ten times or until you feel your pelvic floor musicles fatigue. Rest for
a few seconds in between each squeeze. Steps on to three, count as one
exercise set. If you can do three sets per day in different positions.
Exercise 2 (quick squeeze for power)
Squeeze and lift your pelvic floor muscles as strongly and as quickly as possible. Do not try to hold on contraction, just squeeze and let go. Rest for a few seconds in between each squeeze. Repeat this 10 times or until you feel your pelvic floor muscles fatigue.
You can do these exercises set one to three times per day.
UPPER LIMB STRETCHES:-
Usually due to frequent feeding periods, the mother’s posture starts to droop. This causes neck aches and shoulder pain. In order to avoid this, you could do the following stretches.
- While
stretching left side of the neck, place right hand over the side of
head and pull the neck towards the same side. Neck stretch can be felt
on the left side. Make sure that the side of stretch i.e., left side
shoulder is not lifted. Hold for 10 seconds, repeat 10 times. Repeat on
the right side as well.
- To
stretch the back of the neck, look down towards your chest so that your
chin touches your upper chest. Hold for 10 seconds, repeat 10 times. To
stretch the front of the neck, look towards the ceiling. Hold for 10
seconds, repeat 10 times.
- Clasp
your hands behind the back with the fingers interlaced. Breathe in and
while breathing out lift the hands up as shown in the figure. Stretch
and hold for 10 seconds, repeat 5 to 15 times.
- Place
one arm across the chest and use the other arm to pull the shoulder
towards body from the elbow joint. Hold for 10 to 15 seconds and repeat 5
to 10 times on each arm.
BREASTFEEDING POSTURES:-
- Sit upright on a straight back chair. Use a pillow to support your lower back.
- Put
your feet up as shown below. Being comfortable ensures efficient
breastfeeding to the baby and prevention of backache in mother.
CORE EXERCISE:-
Core contraction – In a seated position, place both hands on abdominal muscles. Take small controlled breaths. Slowly contract the abdominal muscles, pulling them straight back towards the spine. Hold the contraction for 30 seconds, while maintaining the controlled breathing. Complete 10 repetitions.
Pelvic bridging – Though the pelvic bridging is an easy to do exercise, it is highly useful in maintaining strength in the lower back and useful in a lower backache prevention programme. Pelvic bridging is also a great exercise that strengthens the paraspinal muscles, the quadriceps muscles at the top of your thighs, the hamstring muscles in the back of the thighs, the abdominals and the gluteal (butt) muscles.
- Lie
on a flat surface. Bend your knees and place your feet flat on the
floor with your feet apart. Your palms should be flat on the floor
alongside your body.
- Relax
your upper body and back while you draw in your abdominals and squeeze
your pelvic floor muscles (as if you were stopping the flow of urine)
and slowly push your pelvis up towards the ceiling. Hold in an up
position for a slow count of three and lower your body back to start
position.
COBRA POSE
Lie on the belly, with the hands placed right below or slightly forward on either side of the shoulder joint. Breathe in and then slowly use your hands to come a little upward and look straight while breathing out. Hold for 10 seconds and relax. Repeat 10 times.
FLUTTER KICKS
Start by lying flat on your back on a mat with your arms by your sides and your palms down. Extend your legs fully out with a slight bend in your knees. Lift your heels about 6 inches off the floor. Make small, rapid up and down scissor-like motions with your legs.
The key is to focus on having your midsection do all the work and to keep your abs constantly contracted throughout the exercise. If you have a lower backache, keep the hands tugged at the low of your back. Perform 10-15 repetitions per set. Do 3 sets.

Lie on one side of the body. Breathe in and then lift your body off the ground and balance on one forearm and the side of your foot. Contract your abdominals and relax your shoulders. And breathe out. Hold that position for 10 seconds. Repeat thrice on each side.
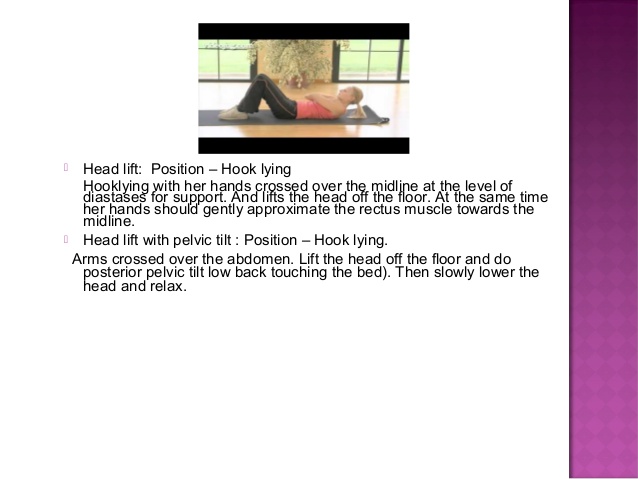
HEAD LIFT

In a lying down position, knees bent at 90° angle, feet flat, slowly lift the head, chin toward your chest, (concentrate on the isolation of the abdominals to prevent hip-flexors from being engaged), slowly contract abdominals toward the floor, hold for two seconds, lower head to starting position for 2 seconds. Complete 10 repetitions.
ABDOMINAL CRUNCH
Place your hands behind your neck or head, keep in mind not to pull head or neck up during the exercise, which can place extra strain on the spine. Your head and neck should be resting on your hands. Breathe in and lift your shoulders towards the ceiling using your abdominal muscles and pause at the peak. It is very important not to lift your entire back off the floor, as this can cause back strain. Ease back down slowly as you inhale. Relax your abs before doing another crunch. Repeat 10 times per set, do 3 sets. You can slowly progress to 20 per set.
SIBE ABDOMINALS
Lie flat on the ground with the knees bent. Cross one leg and place the ankle on the opposite thigh/ knee. Clasp the hands behind the head, twist the trunk, and crunch. While crunching try to touch the opposite elbow to the folded knee, i.e., left elbow trying to touch the right folded knee (as seen in the figure below). Repeat 10 times on each side per set. Do 3 sets.
PLANK
Position yourself face-down on the floor, resting on your hands and knees. Place your elbow at 90 ̊ and flex your foot so that you can feel the toes on the floor evenly. Brace your abs, and push your knees off the floor so your weight is distributed evenly between your toes and hands. Lower your hips so your body forms a straight line, like a plank. Hold this position for 10 to 20 seconds. Repeat this 5 times. The seconds can be progressed to a minute (60 seconds).
PUSH-UPS
Come onto the crawl position, cross the legs and place the hands right under the shoulder. Keep the body in a straight line and bring the body down. Make sure that the elbows are near the body. Start with 5 repetitions per set, do 3 sets and slowly progress to 20 repetitions per set.
UPRIGHT PUSH-UPS
Place hands flat against the wall. Contract abdominal muscles towards the spine, and lean the body towards the wall, with elbows bent downward close to body. Pull abdominal muscles in further, with controlled breathing. Release muscles as you push back to starting position. Complete 20 repetitions per set and do 3 sets.
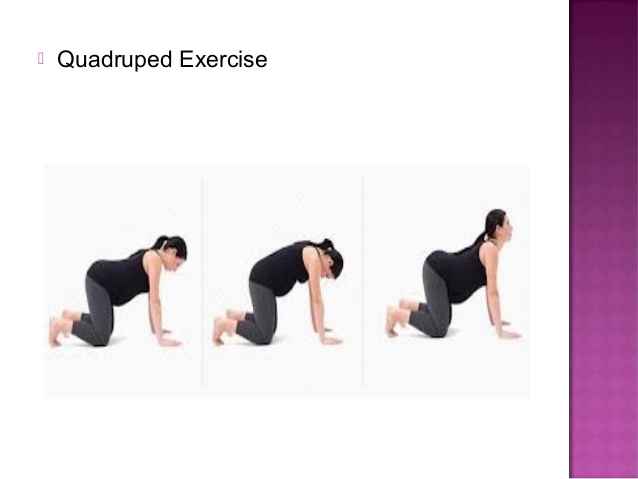
BIRD DOG
Get down on your hands and knees with your palms flat on the floor and shoulder-width apart. Relax your core so that your lower back and abdomen are in their natural positions. Brace your abs, and raise your right arm and left leg until they’re in line with your body. Hold for 5 to 10 seconds. Return to the starting position. Repeat with your left arm and right leg. Continue to alternate back and forth. Try to keep your hips and lower back still, even as you switch arms and legs. Start with 5 repetitions per set, do 3 sets and slowly progress to 20 repetitions per set.
SQUAT AGAINST THE WALL
Also known as a seated squat, stand with back against the wall, feet out in front of the body. Slowly lower body to a seated position so knees are bent at a 90° angle. Contract abs toward the spine as you raise the body back to a standing position. Optionally, this exercise can also be done using an exercise ball placed against the wall and your lower back. Complete 20 Repetitions, 3 sets.
SQUAT WITH SQUEEZE
A variation to the “squat against the wall” is to place a small resistance ball between the knees, and squeeze the ball as you lower your body to the seated position. Complete 20 repetitions, 3 sets.
LUNGES
Stand straight with legs wide apart. Place hands on the hip or hold dumbbells. Place right leg forward and come onto the toes of the rear (left) foot. Balance and bend the knees. Make sure the knees come 90 ̊ and the right bent leg should not cross the toe line. Repeat 10 times for each leg. Do 3 sets.
SQUATS
Stand with the feet apart in the line of the hip, place hands forward as if to reach something, or hold onto a bar/ chair. Now sit down as if trying to sit on the chair and then stand tall again. Repeat this ten times per set. Do 3 sets.
Hope you have a great time doing these exercises! Please note: always consult your doctor before starting a new exercise regimen.