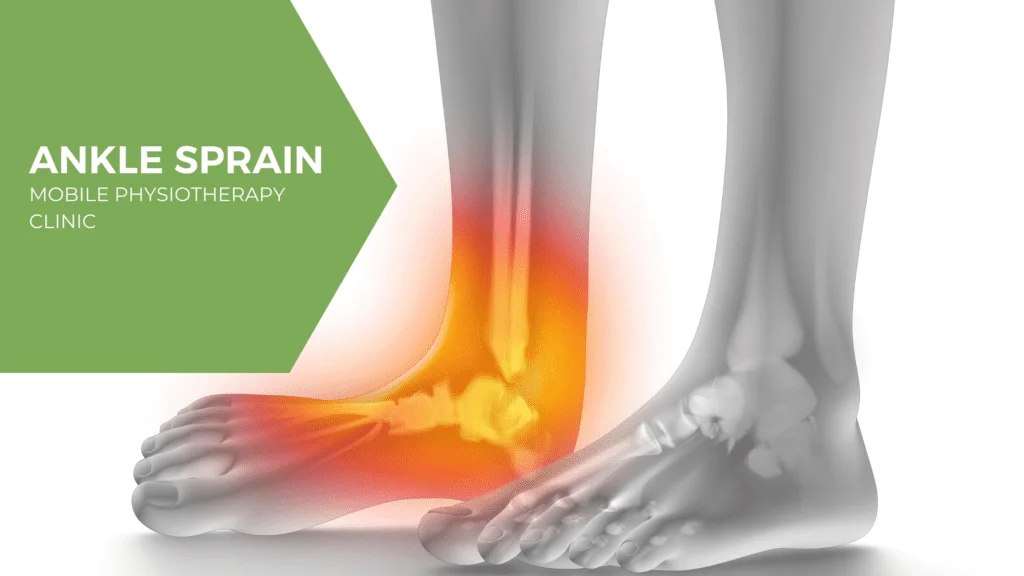
Ankle Sprain: Cause, Symptoms, Physiotherapy Treatment, Exercise
Table of Contents
What is an Ankle Sprain?
Ankle sprain is an injury to the tough bands of tissue (ligaments) that surround and connect the bones of the leg to the foot. The injury typically happens when you accidentally twist or turn your ankle in an awkward way. This can stretch or tear the ligaments that hold your ankle bones and joints together.
All ligaments have a specific range of motion and boundaries that allow them to keep the joints stabilized. When ligaments surrounding the ankle are pushed past these boundaries, it causes a sprain. Sprained ankles most commonly involve injuries to the ligaments on the outside of the ankle.
You should call your doctor right away if you sprain your ankle. Your doctor can determine the severity of the injury and recommend a proper course of treatment. It can take several weeks or months for a sprained ankle to heal completely.
Doctors grade ankle sprains by how severe they are:
- Mild (grade I): Your ligaments are stretched but not torn. Your ankle still feels stable. You may have some pain and stiffness
- Moderate (grade II): One or more ligaments are partially torn. The joint isn’t totally stable, and you can’t move it as much as usual. You have swelling and moderate pain
- Severe (grade III): One or more ligaments are totally torn, and your ankle is unstable. You have a lot of pain and can’t move it
Symptoms of Ankle Sprain
You may have a sprained ankle if you notice the following symptoms in the ankle:
- swelling
- tenderness
- bruising
- Pain, especially when you put body weight on the affected leg
- inability to put weight on the affected ankle
- skin discoloration
- stiffness
The ankle can sustain many different types of injuries. It’s important to see your doctor when you’re experiencing problems with your ankle. Your doctor can determine whether the injury is a sprain or something more severe.
Causes of Ankle Sprain
An ankle sprain often occurs when the foot suddenly twists or rolls, forcing the ankle joint out of its normal position. During physical activity, the ankle may twist inward as a result of sudden or unexpected movement. This causes one or more ligaments around the ankle to stretch or tear.
Some swelling or bruising can occur as a result of these tears. You may also feel pain or discomfort when you place weight on the affected area. Tendons, cartilage, and blood vessels might also be damaged due to the sprain.
Ankle sprains can happen to anyone at any age. Participating in sports, walking on uneven surfaces, or even wearing inappropriate footwear can all cause this type of injury.
Risk Factors of Ankle Sprain
Factors that increase your risk of a sprained ankle include:
- Sports participation: Ankle sprains are a common sports injury, particularly in sports that require jumping, cutting action, or rolling or twisting of the foot such as basketball, tennis, football, soccer, and trail running
- Uneven surfaces: Walking or running on uneven surfaces or poor field conditions may increase the risk of an ankle sprain
- Prior ankle injury: Once you’ve sprained your ankle or had another type of ankle injury, you’re more likely to sprain it again
- Poor physical condition: Poor strength or flexibility in the ankles may increase the risk of a sprain when participating in sports
- Improper shoes: Shoes that don’t fit properly or aren’t appropriate for an activity, as well as high-heeled shoes in general, make ankles more vulnerable to injury
Preventions of Ankle Sprain
A sprained ankle is more likely to get hurt again, so do what you can to lower your risk:
- Keep your ankles strong and flexible. Talk to your doctor or physical therapist about strengthening exercises
- Wear the right shoes for an activity. Choose stable shoes that support your ankle, such as high-top basketball shoes
- If you play a sport, you might want to tape up a weak ankle for extra support. Ask your doctor about a brace if you’ve had more than one sprain
- Be sure the playing field or court is clear of any holes or obstacles
- Get rid of obstacles or trip hazards in your home and yard
Diagnosis of Ankle Sprain
If the injury is severe, your doctor may recommend one or more of the following imaging scans to rule out a broken bone or to evaluate in more detail the extent of ligament damage:
- X-ray: During an X-ray, a small amount of radiation passes through your body to produce images of the bones of the ankle. This test is good for ruling out bone fractures
- Magnetic Resonance Imaging (MRI): MRIs use radio waves and a strong magnetic field to produce detailed cross-sectional or 3-D images of soft internal structures of the ankle, including ligaments
- CT scan: CT scans can reveal more detail about the bones of the joint. CT scans take X-rays from many different angles and combine them to make cross-sectional or 3-D images
- Ultrasound: An ultrasound uses sound waves to produce real-time images. These images may help your doctor judge the condition of a ligament or tendon when the foot is in different positions
Treatment of Ankle Sprain
Your doctor will advise you to follow the PRICE method for the first 24 to 48 hours after the injury.
PRICE stands for:
- Protection: Try to immobilize an area of concern or stay off a weight-bearing joint to prevent further motion and restore alignment. You may be advised to use a brace/splint or crutches to stay off the injured area
- Rest: Cut back your regular exercises and activities of daily living. An injury like a sprain requires a change in your normal routine to let the area heal
- Ice: Apply an ice pack to the injured area for 10 minutes. Do this four to eight times a day. You can use a cold pack, ice bag or plastic bag filled with ice wrapped in a towel. An even better way to ice the area of concern is to use an ice massage method — you can use an ice cube held in a washcloth or put water in a Dixie cup into the freezer. After the cup is frozen, peel back the top of the cup so it is like a frozen push pop. Use a circular motion or back-and-forth motion over the area of concern. You only need three to five minutes to ice this because it will penetrate deeply into the area of concern. To avoid frostbite and cold injury, do not apply the ice for longer than 20 minutes at a time. Once you start to feel numb or uncomfortable, you should stop icing
- Compression: Compression (continuous pressure) of the injured area may help reduce swelling. Using an ACE bandage, you can wrap the affected area always from your fingers towards the shoulder (on the upper body) or from your toes to your groin (lower body). This prevents swelling distal (away from the middle of your body) to where the injury is wrapped. A bandage should feel snug, but not so tight it is uncomfortable or cuts off your circulation. You can adjust as needed. An easier way to apply compression from your knee down is with compression stockings. These can be easily purchased online or over-the-counter
- Elevation: In order to help decrease swelling, keep the injured area elevated on a pillow. You should try to keep the injury above the level of your heart
Depending on the joint involved and the severity of the sprain, sometimes surgery is needed to treat a sprain. If a surgery consultation is recommended, they will evaluate the injury, and the potential to heal both with and without surgery and make recommendations for the best recovery based on your age, activity level, and risk factors involved with surgery.
Often, physical therapy is recommended after suffering a sprain. This kind of injury can take time to heal and may change the dynamics of the joint. The degree of sprain will determine the steps you will need to take in the recovery process.
A physical therapist will work with you to regain strength and mobility in your joints. The therapist will teach you exercises, as well as give you a home exercise program, to prevent the injured joint from becoming stiff.
Exercises to build strength and balance (in ankle and knee sprains) will be increased over time until you are back at a pre-injury level of activity. Your physical therapy can help with a return to exercise, and sports programs and get the affected joint even stronger than it was to begin with. If you have suffered repeated sprains (such as an ankle sprain) or were immobilized for a while as the area healed (like in a boot or cast), physical therapy will be strongly recommended to reduce the chance of getting injured again.
Complications of Ankle Sprain
Failing to treat a sprained ankle properly, engaging in activities too soon after spraining your ankle, or spraining your ankle repeatedly might lead to the following complications:
- Chronic ankle pain
- Chronic ankle joint instability
- Arthritis in the ankle joint
How to Wrap a Sprained Ankle?
After icing your sprained ankle to reduce swelling, you can wrap your ankle by following these steps:
- Ensure you wrap the bandage above and below the joint.
- Begin your wrap several inches above the injured ankle.
- Start your wrap on the inside of the leg and make two wraps around the ankle for stability.
- Continue wrapping around the foot and ankle in a figure-eight pattern.
- Use Velcro or a fastener at the end to stabilize your wrap.
Before you go about wrapping a sprained ankle, make sure you have the necessary supplies such as:
- Scissors
- Soap and water (to clean your ankle before wrapping)
- Elastic bandage
- Pre-wrap tape or locking tabs
Important steps to remember when wrapping an ankle sprain are:
- Wrap above and below the joint
- Wrap in a figure-eight pattern, overlapping 50 percent
- Make sure the wrap is taut
Exercises for Wrist Sprain
Most people can start ankle rehabilitation exercises within three days after the ankle injury, if it’s not too severe. But there’s no set timetable. Listen to your own body, and follow your doctor’s advice.
For the first few days, you’ll need to rest and apply an ice pack to your injured ankle for 10 to 15 minutes every few hours. Don’t let the ice touch your skin and don’t leave it on so long that it burns you.
For many people, the rest period is about three days. After that, you can gradually increase the use of your ankle and begin a program of home exercises or physical therapy.
For non-athletes, doctor-prescribed home exercises alone may be just as good as a supervised exercise program. A 2007 study of 102 people who had sprained ankles showed no major difference in recovery after one year from a supervised exercise program compared to standard care with unsupervised home exercises.
Discuss rehabilitation exercises with your doctor and do your own research to help you decide which treatment is best for you.
These exercises are simple motions you can do up to 5 times per day that can help you maintain your range of motion and flexibility in your ankle.
1. Ankle alphabet
Sit on a couch or comfortable chair. Extend your leg out and trace the letters of the alphabet in the air with your big toe. If there’s no pain, you can repeat this 2 or 3 times. This gentle exercise helps you to move your ankle in all directions.
2. Knee motion
Sit in a chair with your foot flat on the floor. Keeping your foot on the floor, slowly move your knee from side to side for 2 to 3 minutes. This stretches and relaxes the ligaments around your ankle.
3. Towel and tissue scrunches
Place a small towel on the floor in front of you while you sit in a hard chair. With your shoes and socks off, gently grab the towel with your toes, scrunch it up, and count to 5. Then release the towel and repeat. Do this 8 to 10 times— or less if you feel pain.
You can also try this with a tissue.
4. Towel stretch
Sit on the floor with your leg stretched out in front of you. Wrap a towel or strap around the ball of your foot. Pull back on the towel so your toes move toward you. Hold the stretch for 15 to 30 seconds. Don’t overdo it. You only need to feel a mild to moderate stretch on your calf muscle.
5. Standing calf stretch
Stand facing a wall or in front of a countertop and put your hands on it for support. Place your injured ankle about one step back and your good foot forward. Keeping your back heel flat on the floor, slowly bend the knee of your good leg until you feel a moderate stretch in the calf on your injured side. Repeat this 3 times, holding for 30 seconds.
6. Heel raise
Stand with your hands in front of you, resting against a wall, countertop, or chair back for support. With your feet shoulder-width apart, slowly rise up on your toes and come back down. Do about 10 of these at first and work up to 20 or more. Remember, you only want a moderate stretch and no pain. When these become easy, you can switch to doing it only with the toes on your injured side.
7. One-leg balance
With your hands on a wall, countertop, or chair back, lift up your good leg behind you so that your weight rests on the leg with the injured ankle. Try to hold this for 20 to 30 seconds. As you get stronger, try doing it only with the support of one or two fingers. When you’re stronger, do this without holding on.
8. Elastic band push
This is a variation of the towel stretch but with resistance. Sit on the floor. Prop up your ankle with a rolled-up towel or swimming noodle to keep your heel off the floor. Place the elastic band around the ball of your foot and hold the two ends. Now slowly push your ankle forward like you’re pointing your toe. Then slowly bring it back. Repeat this 10 times. Don’t use the band if there is any pain, or if your ankle feels wobbly.
9. Elastic band pull
Tie your resistance band around a heavy object such as a desk or table leg. While sitting on the floor, hook your toes and upper foot into the band. Now, slowly pull your foot back towards you and return it to a vertical position. Repeat this 10 times.
10. Ankle out
Tie your resistance band around a heavy object. Sit or stand and hook the inside of your foot into the end of the band. Slowly move your foot to the outside and back. Then, Repeat 10 times at first, and build up to 20 times.
Also, do this while sitting down with your ankle propped up on a rolled towel or noodle. Tie a loop in the end of the resistance band and hook it around your foot. And, arrange the band to also go around your good foot. Your good foot acts as a pivot. Holding on to the end of the band, turn your ankle out. Then, Repeat 10 times at first, and build up to 20 times.
11. Ankle in
With the resistance band tied around a heavy object, hook the inside of your foot into the band. Now slowly move your foot inward against the resistance band and bring it back. Repeat 10 times, and build up to 20 times.
12. Basic balance
Stand on your injured foot, lift the other foot off the floor behind you, and try to maintain your balance. Use a countertop or chair back for support if you feel unsteady. Also, try to hold this for a few seconds at first. Then build up to 30 seconds and 1 minute, if you can.
13. Balance with eyes closed
Now repeat the basic balance exercise with your eyes closed. This is much harder because you don’t have visual points of reference to help you balance. Be sure to have something for support. Again, try to work up to 30 seconds and 1 minute, if you can.
14. Pillow balance
Do the same basic balance exercise while standing on a pillow. This is much harder. Even if your ankle isn’t sprained, your foot will wobble around a lot and you’ll constantly need to correct your balance. See if you can get to 30 seconds to 1 minute. Stop if you begin to feel pain in your ankle.
15. Pillow balance with eyes closed
This is the most challenging exercise. In fact, see how long you can hold your balance while standing on a pillow with your eyes closed. Be sure to have something available for support. Work up to 30 seconds to 1 minute if you can. But don’t be discouraged if you can’t.
With these exercises, you’re retraining and improving the signals between your ankle and your brain.
FAQs
Ankle sprains typically resolve their pain and swelling in 48 to 72 hours. You can then start reintroducing weight to the damaged foot. Start with just as much weight on your foot as it feels comfortable.
Rest: Stay away of activities that aggravate pain, swelling, or suffering.
Ice: When you wake up, apply an ice pack or an ice slush bath for 15 to 20 minutes at a time, and repeat every two to three hours.
Compression. Apply an elastic bandage to the ankle and squeeze it until the swelling subsides.
Elevation.
The primary objectives are to reduce pain and edema and prevent the ligaments from more damage. This typically involves applying the well-known RICE protocol, which stands for rest, ice, compression, and elevation. For the first 24 to 48 hours, try to avoid exerting as much pressure on your ankle if you experience considerable pain and swelling.
Invest in a few more pillows if you plan to sleep with a sprained ankle. The pillows facilitate better blood flow and foot elevation. They also aid in draining fluids and edema and in separating the feet. If at all possible, place your affected foot above your heart.
You might only need to take self-care steps, but you should discuss with your doctor whether you should have an evaluation of your ankle. Severe symptoms could indicate a broken bone or serious injury to a ligament in your lower leg or ankle.
A small sprain may heal in two weeks, whereas a major sprain may take six to twelve weeks to heal.
Ankle sprains are most commonly characterized by intense pain, edema, bruising, impaired gait, and ankle joint instability. It is important that you get medical assistance as soon as possible if you encounter any of these symptoms.


7 Comments