Bikram Yoga
Table of Contents
Introduction
Bikram Yoga is a specific style of hot yoga developed by Bikram Choudhury in the 1970s. It consists of a series of 26 postures and two breathing exercises, practiced in a room heated to a temperature of 105°F (40.6°C) with a humidity of 40%. The sequence is designed to work every part of the body, including muscles, joints, organs, and glands.
Bikram Yoga is known for its challenging nature and is often practiced in a standardized 90-minute class format. Each posture is intended to be performed in a specific sequence to maximize the benefits of the practice. The heat is believed to help improve flexibility, increase circulation, and promote detoxification through sweating.
While Bikram Yoga has gained popularity for its potential physical and mental benefits, it has also been associated with controversy due to legal issues involving Bikram Choudhury and allegations of misconduct. Despite the controversy, many practitioners continue to find value in the discipline for its focus on physical fitness, mental clarity, and stress reduction.
What Is Bikram Yoga?
- Relatively new to the yoga scene, Bikram Yoga has a contentious past.
- First of all, the setting in which Bikram is done is exceedingly hot.
- Second, it involves 26 distinct positions that need to be executed in a precise sequence within a 90-minute timeframe.
- Nothing can be changed or strayed from the recommended cycles established by Choudhury.
- It cannot be regarded as Bikram Yoga otherwise.
- The goal of the practice’s 26 postures is to maintain a steady flow of oxygen-rich blood throughout the body.
- Most of the positions are classic hatha postures, and to fully benefit from them, you must perform them in the proper order of a Bikram class.
The Bikram Yoga Technique
Pranayama (Deep Breathing)
Benefits:
- As a terrific way to practice restorative yoga, pranayama helps to expand your lungs and sharpen your mind.
- It increases blood circulation and makes sure that your muscles and organs get the most oxygen possible.
- It will ease and settle your thoughts, getting you ready for the next workout.
- Breathing invigorates and purifies your body.
Steps To Follow:
- Maintain a straight posture.
- Keep your legs together and your spine straight.
- Put your fingers under your chin and around the curve of your neck, interlocking them.
- Don’t move your elbows apart.
- Raise your arms so that your wrists just barely brush your ears as you take a breath.
- Maintain a straight head.
- Tilt your head back and allow your hands to follow the movement of your head as you exhale slowly and deeply.
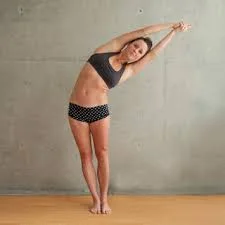
Ardha Chandrasana (Half Moon Pose)
Benefits:
- Your core is strengthened by Ardha Chandrasana.
- It enhances renal function and gives your spine more flexibility.
- The Half Moon Pose tones and tightens your tummy, thighs, hips, and buttocks.
Steps To Follow:
- Raise your arms and assume a straight posture.
- Form the prayer mudra over your head by joining your palms.
- Keep your elbows straight.
- Maintain a solid, flexed, and straight hand position.
- Bend at the right hip in that position, allowing your body to descend to the right.
- While doing this, maintain a straight leg position.
Utkatasana (Awkward Pose)
Benefits:
- Your legs are toned and shaped with utkatasana.
- It treats slipped discs as well as other issues with the spine.
- It elongates the muscles in your spine, hips, and chest.
- It eases back and joint discomfort tones your legs, and strengthens your body.
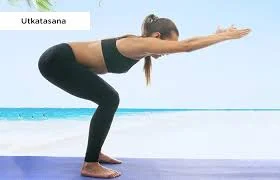
Steps To Follow:
- Maintain a straight posture and space your feet arm’s length apart.
- With your hands pointing down, extend your arms forward.
- Maintain a straight arm position.
- Now, lower your body as though you were sitting on a fictitious chair by bending at the knees.
- Avoid bending your knees past your toes.
- Maintain the position.
Garudasana (Eagle Pose)
Benefits:
- Your skeleton’s biggest joints become more flexible with garudasana.
- It increases the range of motion in your ankles, knees, and hips.
- It makes it possible for your reproductive system and kidneys to receive new blood.
- It also affects your attention and enhances your equilibrium.
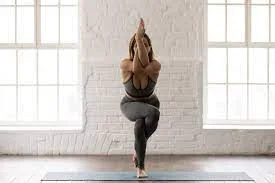
Steps To Follow:
- Maintain a straight posture.
- Your right knee should be bent.
- Stack your right and left knees on top of one another by wrapping your left leg over your right.
- Put the back of your right shin on your left leg.
- Bend your elbows to a 90-degree angle and raise your arms to shoulder level.
- Cover your left hand with your right.
- On the other side, carry out the same process again.
Dandayamana-Janushirasana (Standing Head To Knee Pose)
Benefits:
- Your leg muscles and hamstrings will get stronger from this stance.
- It tones your back, biceps, and triceps muscles and increases the flexibility of your sciatic nerves.
- It strengthens the mind, increases focus, and tones the abdominal muscles.
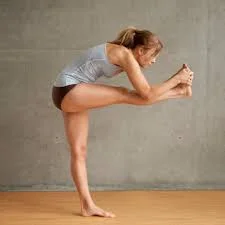
Steps To Follow:
- Position your feet together and stand upright.
- Make a cup shape with your hands by interlocking your fingers.
- Bend at the waist, cupping your palms over the sole of your foot as you raise your right leg up towards your chest.
- Raise your right leg slowly and bring your hands with it.
- Bend your body till your chest touches your right leg’s knee.
- To adopt this stance, you also need to gently bend your elbows.
- Maintain the position.
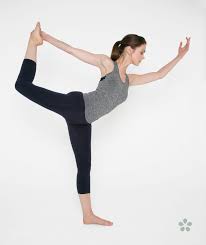
Dandayamana-Dhanurasana (Standing Bow Pose)
Benefits:
- This position tones your upper thighs and improves balance.
- Additionally, it increases the lower spine’s flexibility and strength.
- It cures cardiovascular issues and increases focus and patience.
- It opens blood arteries, bringing new blood to every part of the body.
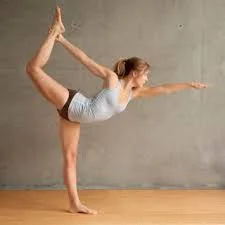
Steps To Follow:
- Maintain a straight posture.
- Grasping one leg from the inside at the ankle, raise it.
- With the palms facing forward, extend the other arm toward the sky.
- Now slowly extend the leg that you raised.
- While doing so, make sure your torso is moving slightly forward.
- Maintain a straight line between your hips and the foot of the leg that is on the ground.
- Stretch the arm of the hand supporting the foot while you kick the opposite leg as high as you can.
- Your upper body should bow further forward as you extend farther.
Tuladandasana (Balancing Stick Pose)
Benefits:
- Your heart muscles are stretched, your brain is revitalized, and your attention is strengthened with tuladandasana.
- It stretches your whole spinal column softly and improves your back and core muscles.
- It helps burn calories and improves your stamina.
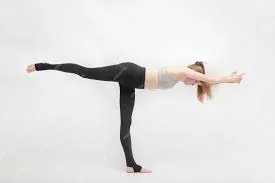
Steps To Follow:
- Raising your arms to the sky, assume a straight stance.
- With your index fingers pointed skyward, clench your fists together.
- Now, raise your left foot off the ground while maintaining a straight back.
- Lift your left leg higher.
- With your arms and your left leg extended, make a ‘T’ with them.
- Maintain the position.
Dandayamana-Bibhaktapada-Paschimotthanasana (Standing Separate Leg Stretching Pose)
Benefits:
- Your sciatic nerves will be strengthened and stretched by this stance.
- It massages the big and small intestines as well as the abdominal organs.
- It reduces stress in the muscles of your lower back, improves the flexibility of your ankles and hips, and establishes emotional stability.
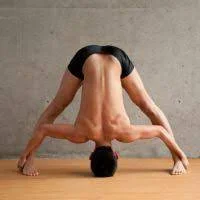
Steps To Follow:
- Maintain a straight posture.
- With your right leg, take a large stride to the right.
- Extend your leg as far to the right as you can.
- Bend forward, between your legs and toward the ground, while extending your arms to their respective sides.
- Stretch your arms down to your ankles and grab them there.
- Pull your head down to the floor by using that grasp to press your torso down farther.
- Straighten your arms, legs, and back.
- Maintain the position.
Trikonasana (Triangle Pose)
Benefits:
- Iyengar yoga’s Trikonasana stimulates your veins, tissues, and nerves.
- It improves the strength of your knees, ankles, legs, chest, and arms while easing lower back discomfort and rheumatism.
- It helps with digestion, relieves anxiety, and enhances heart-lung synchronization.
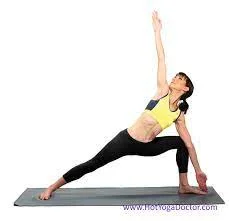
Steps To Follow:
- Place your feet arm’s length apart and stand upright.
- As you bend to the right, maintain a straight waist.
- Forming a straight line, raise your left hand and let your right hand come into contact with the ground.
- With the palm facing outward, place your right hand such that it touches the tips of your right toes.
- Maintain a right foot facing rightward.
- Extend your left leg and bend your right knee as far as possible.
- The legs ought to be tight and flexed.
- Look up at your left hand and turn your head to the left.
- Maintain the position.
Dandayamana-Bibhaktapada-Janushirasana (Standing Separate Head To Knee Pose)
Benefits:
- This position tones your thighs, buttocks, hips, waist, and belly.
- It controls your immune system, metabolism, and thyroid function.
- It is advantageous for those who are depressed.
- It treats menstruation issues, low blood pressure, and constipation.
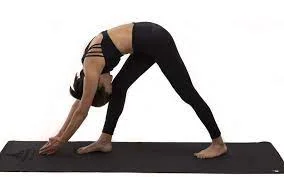
Steps To Follow:
- Position your feet together and stand upright.
- Raise your arms over your head and firmly clasp your hands together.
- Raise your right leg so that it is two or three feet away from your left leg.
- Point your right foot in that direction.
- Now, bend your body to the right until your head hits your right knee while tucking your chin into your chest.
- While doing this, make sure your hands and legs are straight.
- Maintain the position.
- Continue on the opposite side.
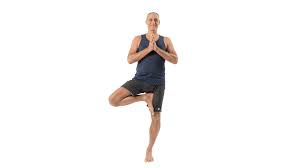
Vrikshasana (Tree Pose)
Benefits:
- Vrikshasana helps with balance and posture.
- It improves the range of motion in your ankles, knees, and hip joints.
- It promotes neuromuscular synchronization and guards against hernias.
- It lessens flat feet and strengthens your shoulders and eyes.
- It also makes you more patient.
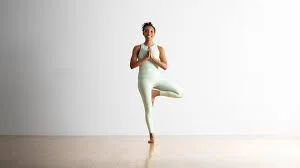
Steps To Follow:
- Position your feet together and stand upright.
- Your arms ought to remain by your sides.
- Put your palms together in front of your chest in the mudra of prayer.
- Lift your right foot.
- Place it on your left leg’s upper thigh, close to the left thigh’s root, after bending it at the knee.
- Maintain your left leg straight and your shoulders squared.
- Maintain the position.
Padangustasana (Toe Stand Pose)
Benefits:
- Your knees get stronger and more supple in this stance.
- It improves mental toughness and heals hemorrhoid issues.
- It fortifies your ankles, toes, hips, abdominal muscles, and joints.
- It helps you focus better and straighten your posture.
- You will remain composed and balanced while in this stance.
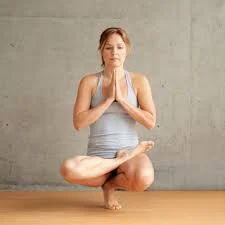
Steps To Follow:
- Keep your arms at your sides and stand erect.
- Your right knee should be bent toward your chest.
- Place the ball of your right foot on your left knee.
- Verify that your right foot’s sole is pointed upward.
- Now, place your buttocks on the left foot’s heel while bending down on your standing left leg.
- Your left leg’s thigh ought to be parallel to the floor.
- Put your hands in front of your chest, together in the mudra of prayer.
- Maintain the position.
Savasana (Dead Body Pose)
Benefits:
- Savasana calms and inwardly purifies the body.
- It relieves sadness, anxiety, stress, and exhaustion.
- It eases muscular tension and treats sleeplessness.
- It increases blood circulation, enhances mental clarity, and promotes mental wellness.
- It aids in the treatment of diabetes, asthma, and constipation.
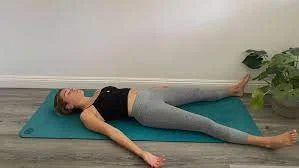
Steps To Follow:
- Put yourself on your back.
- Maintain a tiny distance between your legs.
- Lay your arms down the length of your body on either side.
- Keep your hands palm up.
- Unwind. Shut your eyes and take a deep breath via your nose.
- Breathe and consciously relax every part of your body.
- Continue holding the stance until you are totally at ease.
Pavanamuktasana (Wind-Relieving Pose)
Benefits:
- Your digestive system is compressed and massaged by pavanamuktasana.
- It tones your thighs and belly while strengthening your arms and increasing hip flexibility.
- It facilitates gas discharge and improves digestion.
- It improves blood circulation in the hip joints and releases lower back strain.
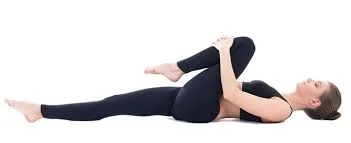
Steps To Follow:
- With your feet together and your arms positioned at your sides, take a flat lay on your back.
- Take hold of your hands and encircle your right knee.
- Press your thigh on the abdomen as you bring it closer to your chest.
- Maintain a straight left leg and neck.
- Put your shoulders square.
- Maintain the position.
Padahastasana (Sit Up Pose)
Benefits:
- Padahastasana extends your spine and improves flexibility.
- It tones your lower body and enhances limb circulation.
- It strengthens the biceps and calf muscles while stretching your shoulders and hamstrings.
- Additionally, it stimulates the pancreas and kidneys.
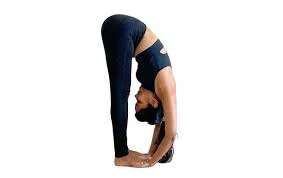
Steps To Follow:
- Step one is to stand with your feet hip-width apart and your back straight. Pull your shoulders down your back and contract your core.
- With your palms facing each other, lift your arms straight over your head while taking a deep breath.
- As you extend your hand higher, lengthen your back.
- Hinging at the waist, lean forward from your hips as you release the breath.
- If necessary, keep your knees slightly bent, but do not lock them.
- Reach for your feet with your hands.
- Depending on how flexible you are, reach for the ground, your ankles, or your shins.
- Don’t try to reach the ground if you can’t reach it.
- Take a breath, raise your head a little, and try to extend your back as far as you can.
- After letting out a breath, bend your head even farther till it touches your knees or shins.
- Maintain a straight back and active posture.
- For five to ten breaths, hold the stance while keeping your breathing steady and even.
- Concentrate on letting go of tension and lengthening the hamstring and spinal stretches.
- Breathe in, raise your arms aloft, and gently raise your upper body back to standing to release the stance.
- Let go, lower your arms to your sides, and unwind your body.
Bhujangasana (Cobra Pose)
Benefits:
- One of the postures in Kundalini yoga, Bhujangasana, enhances digestion and hunger.
- It lowers blood pressure and treats menstruation problems.
- It strengthens and stretches your spine and improves the function of your spleen and liver.
- Your weight is balanced by controlling your metabolism in this stance.
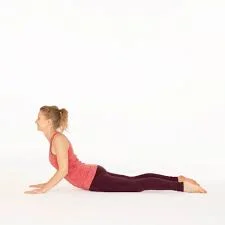
Steps To Follow:
- On your stomach, lie down.
- Maintain your toes together and lay your arms lightly on each side of your body.
- With your palms facing down and lightly pushing into the earth, place them on either side of your chest.
- Now, raise your head, chest, and stomach off the ground by pressing with your palms.
- Bend your arms slightly at the elbows while you work.
- Shoulders should be squared and kept away from the ears. Maintain the position.
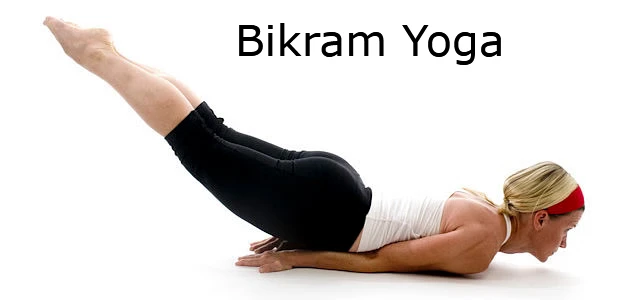
Salabhasana (Locust Pose)
Benefits:
- Salabhasana is ideal for treating sciatica and slipped discs. It eases tennis elbow and strengthens your upper back.
- Additionally, it aids in the removal of leg varicose veins. It supports tenacity and tightens your hips and buttocks.

Steps To Follow:
- Keep your chin on the ground as you lie down on your stomach.
- Allow the tips of your heels to meet.
- Tighten your arms beneath your stomach now.
- Spread your fingers and direct them toward your knees with your palms facing down.
- Raise each leg independently, the right and left.
- As though you were kissing the earth, lower your chin and plant your lips there.
- Bring both of your legs together, squeeze your hands together, and raise them together as if they were one.
- Sustain the position.
Poorna Salabhasana (Full Locust Pose)
Benefits:
- Poorna Salabhasana is effective in treating slipped discs and spondylosis.
- It tones your arms, thighs, abs, and hips while also making your rib cage more elastic.
- It treats rheumatism, menstruation irregularities, and lower back pain.
- It corrects hunched-over posture.
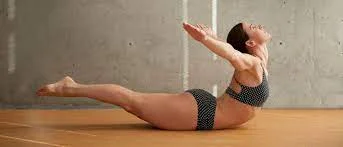
Steps To Follow:
- On your stomach, lie flat.
- With your palms pointing down, extend your arms out to the sides.
- Maintain a straight stance.
- Raise your body, head, and chest off the ground.
- Raise your arms with them, extending them outward while keeping your palms down.
- Lift your legs off the floor.
- Maintain the position.
Dhanurasana (Bow Pose)
Benefits:
- Your lungs expand in Dhanurasana.
- Your spinal nerves are revitalized and strengthened by it.
- It eases constipation, enhances digestion, and functions better in your big and small intestines.
- It improves the function of the kidneys, spleen, liver, and diabetes in addition to treating bronchitis.
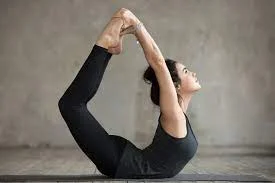
Steps To Follow:
- On your stomach, lie down.
- Your arms should remain by your sides.
- Legs should be hip-width apart.
- To support your ankles, extend your arms and bend your knees.
- Pull your legs back by using your hands to provide pressure to your ankles.
- Take off your legs and body off the ground.
- Hold the position and maintain a straight gaze.
Supta Vajrasana (Fixed Firm Pose)
Benefits:
- Supta Vajrasana stimulates the thyroid glands and avoids hernias.
- Your rib cage is expanded and stretched by it.
- It balances the adrenal glands and relaxes your legs.
- It boosts bravery and gets rid of wrath.
- This position eases constipation and promotes mental relaxation.
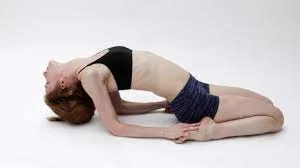
Steps To Follow:
- With your fingers pointing forward, sit in Vajrasana and lay your palms beside your buttocks.
- Bend backward while maintaining your elbow and right forearm on the ground, followed by your left forearm and elbow.
- Look forward to supporting your torso with your elbows.
- With your fingers, reach toward and grab your toes.
- Maintain the position.
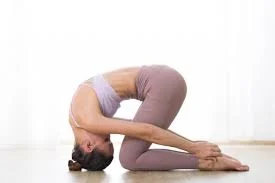
Ardha Kurmasana (Half Tortoise)
Benefits:
- Shoulder and neck tension is released with Ardha Kurmasana.
- The Yin yoga position improves mental clarity and memory.
- It helps with irritable bowel syndrome and asthma.
- It stretches your spine in a soothing manner and tones your belly and thighs.
- It also makes your hips more flexible.
Steps To Follow:
- As you sit in Vajrasana, raise your arms to the sky.
- Interlock both of your thumbs and bring your palms together.
- Keep your arms extended and straight, such that your biceps are in contact with your ears.
- Now lower yourself to the floor by bending at the waist and lowering your whole body.
- Touch the earth with your small fingers and forehead.
- Maintain the position.
Ustrasana (Camel Pose)
Benefits:
- Your nerves are stimulated by Australia.
- It relieves back pain and increases neck flexibility.
- It is beneficial to the thyroid gland and extends your throat.
- It strengthens your back, opens up your chest, decreases menstruation discomfort, and enhances posture.
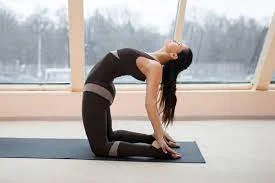
Steps To Follow:
- Squat on a mat, with your hands on your hips.
- The soles of your feet should point upward toward the ceiling, and your shoulders and knees should be in a straight line.
- Gently stoop back and put your fingertips up to the soles of your feet.
- Look up while maintaining a straight-arm posture. Maintain the position.
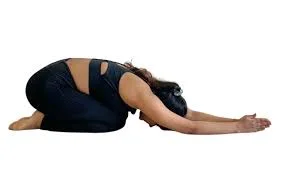
Sasankasana (Rabbit Pose)
Benefits:
- Your spine and back muscles will become more flexible and supple after performing Sasankasana.
- Your nerves receive new blood and oxygen as a result.
- Your shoulders and neck are released as you perform this pose.
- It revitalizes the thyroid gland and helps lessen nasal and cold symptoms.
Steps To Follow:
- Assume a Vajrasana pose.
- Lift your behind off the bottom of your shoe.
- Maintain a straight back and place your arms by your sides.
- Bend forward from the waist now, bringing your back into an arch.
- With your arms extended backward and extending to the soles of your feet, place your forehead against your lower thighs.
- Thumbs should be placed on the ankles.
- Your other four fingers should come in gentle contact with your foot soles.
- Maintain the position.
Janushirasana-Paschimottanasana (Sitting Head To Knee Stretching Pose)
Benefits:
- Pose improves blood flow to the pancreas, thyroid, intestines, and liver.
- It helps with digestion, prevents allergies, and treats persistent diarrhea.
- Your blood sugar levels are balanced, and the asana improves renal function.
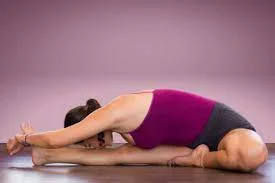
Steps To Follow:
- Stretching your legs out in front of you, take a seat on your buttocks.
- With your left leg bent, lay the whole sole on your inner upper right thigh and the heel close to your anus.
- Bend forward toward your right leg and extend your arms above your head.
- Bend both of your wrists at the elbows and grasp the big toe of your right foot.
- Put your right knee on top of your head.
- Maintain the position.
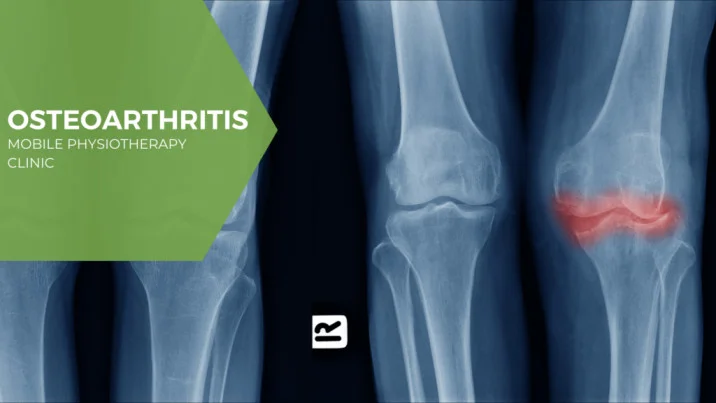
Ardha Matsyendrasana (Spine Twisting Pose)
Benefits:
- This stance helps prevent arthritis and slipped discs by increasing the suppleness of your spine.
- It releases tension in the back and relaxes your neurological system.
- The posture helps your lungs get more oxygen.
- It also enhances reproductive health and detoxifies interior organs.
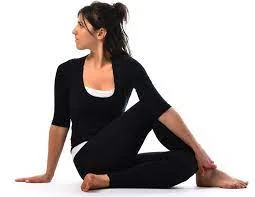
Steps To Follow:
- Prop yourself up on your buttocks.
- Maintain your feet together and your legs extended forward.
- Place your left foot close to your right thigh and bend your left leg over your right leg.
- Now bring your right leg closer to your pelvis by bending it.
- Your left buttock must be pressed on the sole of your right foot.
- Maintain eye contact with your left shoulder while bending your body to the left.
- Keep your back straight.
- Put your hand on your back and extend your left arm behind you.
- Extend your right arm and bring your right hand to rest on your right knee.
- Maintain the position.
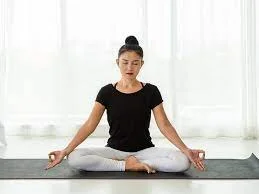
Kapalbhati Pranayama (Skull Shining Breathing Technique)
Benefits:
- The Kapalbhati Pranayama improves digestion and helps your body get rid of waste products and impurities.
- It gives your brain a boost and revitalization.
- With consistent practice, the breathing method will make your face shine.
- It treats hair loss, sinuses, and asthma.
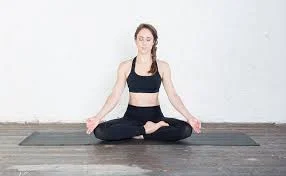
Steps To Follow:
- Put your hands in the meditation mudra on your knees while sitting in Sukhasana.
- Take a calm, deep breath through your nose.
- Bring your stomach in close to your spine.
- Release the tension in your body by letting go of the air in a puff, then inhale automatically again.
- One round of Kapalbhati is completed after doing this 20 times.
- At the conclusion of each cycle, close your eyes and listen to your body as you gently relax into Sukhasana.
How Is Bikram Yoga Different From Hot Yoga?
- Due to the insistence that studios use a more general phrase rather than the one bearing his name, hot yoga became a catch-all term for a variety of yoga practices.
- They all share one thing, though: a hot yoga session is conducted in a room that is heated to a temperature of around 86 degrees Fahrenheit (30 degrees Celsius) to 104 degrees Fahrenheit (40 degrees Celsius).
- Maintaining a humidity level of around 40% is ideal in these programs, particularly for a Bikram class.
- The positions that are done might differ greatly if the class is anything other than Bikram.
- One sequence after another may incorporate a variety of asanas, performed at a tempo that the instructor deems appropriate.
- Additionally, there are specialty forms of hot yoga, such as Moksha, CorePower, and BaptistePower Vinyasa Yoga, to mention a few.
Benefits of Bikram Yoga
- After a Bikram Yoga session, the room’s increased warmth undoubtedly contributes to your overall mood, but the poses and breathing are also important components.
- It may become clear to you after a class that Bikram Yoga is not for everyone.
- Even if you’re a little nervous or turned off by the room’s heightened heat, you should still give it a try.
Here are a few reasons why it could be advantageous to you:
Reduces stress
All types of yoga, including Bikram Yoga, are excellent for reducing stress. As a natural and healthful way to manage stress, it’s really grown in popularity and is now favored by both novices and seasoned veterans.
Improves flexibility
It will be simpler for you to perform the postures that are a part of any hot yoga session in a heated setting. extending your muscles after a simple warm-up is really far safer and more beneficial than extending them when they’re cold. Thus, you may get more flexible in the shoulders, lower back, and hamstrings by taking a Bikram class.
Eases depression
This is an additional advantage that practically any kind of yoga instruction may provide. On the other hand, Bikram Yoga is great for promoting calmness and relaxation. This can lessen depressive symptoms and make you feel better, which can lessen the intensity of the symptoms associated with depression.
Nourishes the skin
It should come as no surprise that Bikram Yoga will cause you to perspire profusely. In one of these classes which doesn’t raise the temperature, you will perspire more than in another. However, sweating may be quite beneficial for achieving healthy skin since it improves the blood flow that carries oxygen to the skin cells, nourishing them from the inside out.
Builds bone density
For those who want to join these sessions, Bikram Yoga is particularly beneficial since it increases the advantages of regular yoga in a hot setting, which includes promoting bone density. You can increase the density of your bones by adopting postures that ask you to sustain your own weight. Age-related loss of density occurs in the hips, lower back, and neck; however, Bikram Yoga has been demonstrated to counteract these effects.
Burns more calories
Put on more heat if you want to increase your calorie burn. A 90-minute Bikram Yoga session may nearly quadruple an individual’s calorie expenditure, whereas a typical yoga class can burn between 150 and 200 calories. This weight reduction benefit is available in most hot yoga courses.
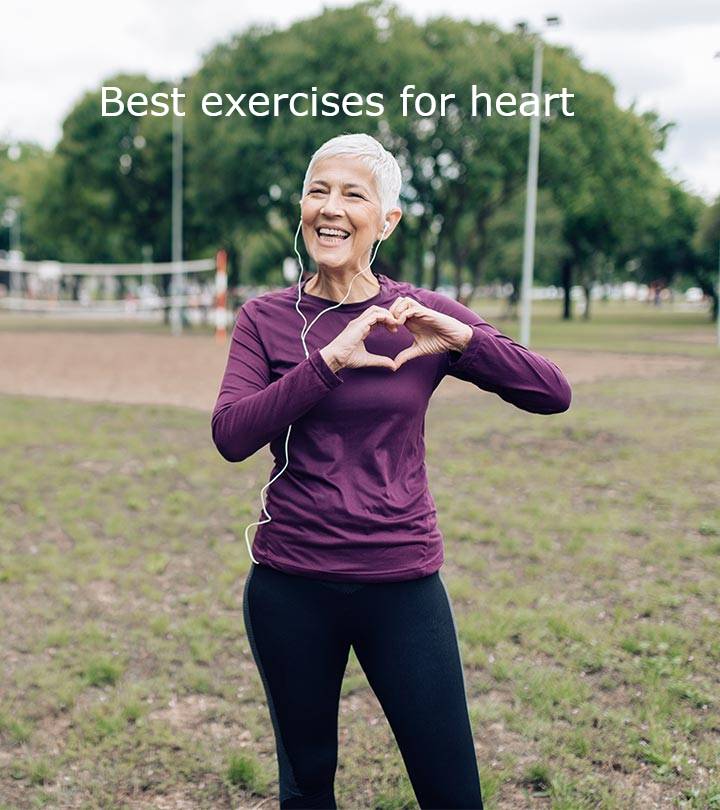
Provides a cardiovascular boost
It gets harder to achieve a variety of stances in a hot classroom. Because it maintains the heart pounding and encourages the passage of new, nutrient-rich blood to the organs, this is beneficial for the cardiovascular system. Additionally, this can greatly accelerate metabolism.
Bikram Yoga Safety Tips
Before entering a Bikram Yoga classroom, let me advise you to exercise caution. Pay attention to your body, and quit right away if you sense even the tiniest sign that you are dehydrating or experiencing heat fatigue. Use the following safety measures to ensure your safety:
Acclimate and modify
Go slowly. Give yourself time to adjust to the room’s increased temperature. Give your body enough time to adjust to the warmth, even if you’ve attended a lot of hot yoga courses in the past. When it comes to newbies, this is even more crucial. While you acclimate to the heat, try not to expend too much energy. Try not to overwork yourself; take your time in the class and with the poses that are being taught.
Water, water, and more water
Just remember to stay hydrated. Aim to consume at least 16 ounces of water an hour or two before entering the classroom. Additionally, remember to bring a water bottle to class and fill it as frequently as you can during the lesson. After the lesson is over, drink up to three 16-ounce portions of water for each hour you spend in the class.
3 Beginner’s Tips for Practicing Bikram Yoga
Here are a few tips to help you stay healthy and enjoy yourself while practicing Bikram yoga:
Recognize the boundaries of your body. You might be more inclined to exert greater physical effort in a hot Bikram class but try not to go too. It’s possible that you won’t recognize muscular tension as quickly in a warm environment as you would in a regular yoga session, and that once you leave the studio and your body cools down, you could find that you’ve hurt yourself. Before attempting a hot yoga session, take a few regular yoga courses so you have a comfortable baseline for how far your body can stretch. Make periodic physical checks to make sure you’re keeping safe during a Bikram class.
Wear clothes that wick away moisture. During Bikram yoga, your body will perspire a lot, therefore you don’t want to be burdened by fabrics that absorb moisture and retain perspiration, like cotton. Instead, use fibers like nylon or polyester that wick away sweat.
Begin slowly. Bikram yoga might seem more intense due to the hotter atmosphere and challenging poses, so you might not want to try it straight away if you’ve never done any hot yoga. Rather than trying Bikram, think about taking Abeginner’s hot yoga session to see whether you like the hot yoga format.
Drink water. Drink water both before and after the practice to prevent dehydration because Bikram yoga classes cause you to perspire a lot. Before a Bikram class, try to drink at least six cups of water throughout the day. However, don’t drink too much water just before because it might make you feel bloated or even queasy while going out. You are welcome to keep a water bottle beside your yoga mat during a Bikram yoga class and take little snippets of water as needed to stay well hydrated.
Conclusion:
Bikram yoga is performed in a regulated room with a temperature of 40 degrees Celsius and 40% humidity. The practice consists of a series of exercises that are prearranged and performed for 90 minutes. There are 26 asanas in the session, all of which are performed with an emphasis on breathing. Bikram yoga eases mental tension and enhances flexibility, posture, and circulation. Pose variations like triangle, half moon, eagle, bow, and locust are among the most well-known variations of Bikram yoga.
FAQ
Although this may sound extreme, Bikram yoga is said to be a cleansing workout that improves flexibility, strength, and mental and physical discipline.
Original 26 + 2
The Bikram series is still sometimes referred to as “hot yoga,” but it is now formally known as the “Original 26 + 2.”The practice, known as the Original 26 + 2, consists of two breathing exercises and 26 postures, most of which are done twice in the same sequence, for a total of ninety minutes.
In a nutshell, hot yoga is merely regular yoga performed in a heated space, whereas Bikram yoga refers to a particular sequence of 26 postures. Are you prepared to perspire? Bikram and hot yoga studios have temperatures between 90 and 105 degrees. Bikram yoga has more contemporary beginnings, although yoga is an age-old discipline with roots in
India.
In order to simulate the temperature of India, classes consist of a set sequence of 26 postures that are practiced in a room that is heated to 105 °F (41 °C) and has a 40% humidity level. The walls of the room are adorned with mirrors, and carpets are installed throughout. The yoga poses of the pupils may be modified by the teacher.
Bikram yoga has been demonstrated in published research to enhance lower body strength, upper and lower body range of motion, and balance in healthy individuals.
References:
- Driscoll, T. (2021, September 21). What Is Bikram Yoga? Yoga Society. https://www.yoga-society.com/blogs/types-of-yoga/what-is-bikram-yoga
- What Is Bikram Yoga? 26 Yoga Asanas To Do In This Session. (2023, October 18). STYLECRAZE. https://www.stylecraze.com/articles/bikram-yoga-the-ultimate-guide-to-all-asanas-and-their-benefits/
- Bikram Yoga Guide. (2021, September 21). Master Class. Retrieved January 2, 2024, from https://www.masterclass.com/articles/bikram-yoga-guide