
Anterior Cruciate Ligament Injury: Causes, Diagnosis, Treatment.
Table of Contents
What is the Anterior Cruciate Ligament Injury?
- Definition:
- An Anterior Cruciate Ligament Injury is a tear or sprain of the anterior cruciate ligament, which is the strong band of tissue that connect your thigh bone to your shinbone.
- An overview:
- The ligament is a strong band that connects one bone with another bone.
- It helps to stabilize your knee joint.
- It also helps in holding the knee in its original anatomical position.
- ACL injuries are common knee injuries found in athletes.
- ACL injuries most commonly occur during sports that involve sudden stops or changes in directions.
- This type of injury occurs mostly in those sports players, who involve activities like the pivoting motion of the lower extremity with a foot in pronation position.
- So most commonly seen in football players, basketball players, and soccer players also.
- The ligament injury has a mild to severe form.
Relevant Anatomy of an Anterior Cruciate Ligament:
- Origin and Insertion of ACL ligament:
- It originates from the posteromedial aspect of the lateral femoral condyle in the intercondylar notch.
- Then it runs in the following directions: inferiorly, medially, and anteriorly.
- After this, it is inserted anterior to the intercondyloid eminence of the tibia.
- Nerve supply of ACL Ligament:
- The ACL ligament receives nerve fibers from the posterior branches of the tibial nerve.
- These nerve fibers supply the posterior joint capsule.
- The vessels surrounding the ligament supply the anterior to the infrapatellar fat pad.
- Blood supply of ACL Ligament:
- The blood supply of the ACL Ligament is by the middle geniculate artery.
- The distal part of the ACL Ligament is vascularized by branches of the lateral inferior geniculate artery and medial inferior geniculate artery.
Signs and Symptoms of an Anterior Cruciate Ligament injury:
- The most common symptoms found are described below:
- The patient is having to complain of severe pain.
- Rapid accumulation of swelling in the surrounding and involved area.
- A popping kind of sensation is felt in the knee at the time of injury.
- Hemarthrosis in the knee joint.
- The patient is not able to continue his or her previous continued activity.
- The patient is not able to affect extremities.
- weight-bearing becomes difficult.
Causes of an Anterior Cruciate Ligament injury:
- Sports that required Suddenly slowing down and direction changes activities.
- Landing on uneven surfaces from jumping activities.
- Stopping suddenly
- Direct blow to the knee joint.
What is the Mechanism of injury?
- ACL Injuries can occur from two types of mechanisms:
- Contact mechanism and Non-contact mechanism
- both are described below in detail:
- The common contact mechanism is a direct blow to the lateral side of the knee resulting in a valgus force to the knee.
- and The non-contact mechanism is a rotational mechanism in which the tibia is externally rotated on plated foot.
How to do Diagnosis of an Anterior Cruciate Ligament injury?
It is done in two ways:
(1)By clinical examination
(2)By Investigations suggested by your doctor
The Diagnosis can be made on basis of clinical examination but you may need further investigations to determine the severity of the injury. so both are described below in detail.
Clinical Examination of an Anterior Cruciate Ligament injury:
It is done by your doctor after an Anterior Cruciate Ligament injury.
Your Tibial bone becomes anteriorly lax relative to your femur bone.
So assessment and examination are done by Special tests related to Anterior Cruciate Ligament.
It is done by Two special tests:
Anterior Drawer Test
Lachman Test
Both the special tests are described below in detail:
Anterior Drawer Test:
- Patient position:
- Supine lying With Flexion of the knee at 90 degrees and hip at 45 degrees, with foot flat over couch or plinth.
- The procedure of the Test:
- Place both hands behind the knee joint and thumb over the anterior knee joint line.
- Pull the proximal part of the patient’s leg anteriorly.
- so the drawer of 6 to 8 mm is considered a positive test.
- The examiner will also feel the anterior translation of bone.
Lachman Test:
- Patient position:
- Supine lying with the knee flexed up to 20 degrees to 30 degrees.
- The procedure of the Test:
- Place one hand over the distal femur and with another handgrip the proximal part of the tibial surface and put your thumb on the anteromedial joint margin.
- Now pull the proximal part of the patient’s leg anteriorly.
- So anterior translation of bone with soft end feel is considered a positive test.
Investigations for an Anterior Cruciate Ligament injury?
X-ray:
- it is important to rule out any fracture related to the knee joint.
- but soft tissue injuries can not be diagnosed with an x-ray.
Magnetic Resonance Imaging(MRI):
- it will show the extent level of an ACL injury.
- it will also show structural damage to other surrounding tissues.
What are the Grades of the severity of an Anterior Cruciate Ligament injury?
- It is described here in detail:
- The Grades are divided into three types:
- Grade-1:
- The mild injury causes only micro-tears in the ligament.
- because of micro-tears, there will be ligament stretch.
- but the instability is not seen.
- Grade-2:
- Moderate injury in which ACL is partially torn and more stretched.
- some amount of instability is seen.
- weight-bearing becomes difficult.
- Grade-3:
- A severe injury in which the ligament is completely torn or fully stretched.
- the knee joint becomes totally unstable.
- weight-bearing is not possible for the patient.
What is the Treatment for an Anterior Cruciate Ligament injury?
The treatment after an ACL injury is divided into 3 types:
Immediate treatment after an injury:
RICE Protocol can be used as first-aid immediately after injury.
Rehabilitation or Physiotherapy treatment:
Physiotherapy treatment is important to reduce pain and swelling and for restoration of normal functions of the knee joints.
Surgical treatment:
If conservative treatment is not affected, so your doctor may recommend you for surgical procedures.
So the treatment for an ACL injury is described below in detail:
Immediate treatment protocol after an injury:
- RICE Protocol is used as an initial treatment tool during the first 24 to 48 hrs.
- Introduction:
- Basically, RICE is an acronym or abbreviated form of the type of treatment.
- It is a simple self-care technique that helps to cure the following conditions:
- Reduce swelling that occurred because of injury.
- Reduction in the amount of pain caused by injured tissues.
- Will speed up your duration of recovery.
- And also will help to make the healing process of damaged soft tissue as early as possible.
What is the full form of RICE?
Or
What does RICE stand for?
- It stands for the following:
- R stands for = Rest
- I stands for = Ice
- C stands for = Compression
- E stands for = Elevation
- So The RICE approach is described in detail.
Rest:
- It is recommended to avoid or stop the use of injured or affected body parts.
- Here are a few benefits of resting position:
- Because of the resting position, the injured or affected body part will remain in the immobilization position.
- So it will prevent further injuries.
- And it will also provide time for early recovery or healing process of damaged soft tissue.
- How can give the resting position to the affected area?
- With the help of the following devices, you can give a resting position.
- Splints
- Braces
- Canes
- Crutches
- According to the area involved you can prescribe the device.
- For an example:
- Splints are used for upper limb injuries.
- Braces are used to immobilize the knee joint and surrounding structures.
- Canes are also used to immobilize your forearm region while walking at a shorter distance.
- Crutches are used to support your upper limb.
- It is remembered to avoid movements of the body part and keep the weight off from the affected area.
Ice:
- It is also known as ‘ Cryotherapy ‘
- Application of cold will reduce pain by making the affected area numb.
- What type of physiological effects can be seen after the application of cold?
- Cold reduces Tissue metabolism.
- So by this phenomenon, there will be constriction of the blood vessels.
- The application of ice will also decrease the nociceptive propagation of stimulus to the brain.
- Which will reduce pain sensations.
- It will also help to reduce muscle spasms occurred because of soft tissue injury.
- You can apply ice with the help of the following:
- Ice packs
- Ice bags
- Before application of ice packs or ice bags, wrap them in a cloth or towel whatever is available.
- It will help to prevent frostbite. so before applying make sure it does not touch the skin directly.
- In emergency situations, you can also use ice bags of frozen vegetables.
- What is the procedure for the application of ice?
- Apply ice over the injured area for approximately 10 to 15 minutes.
- Or for 4 to 8 times in a while day.
- It will definitely help if you will apply it within the first 3 to 4 days of injury.
- Always remember that never allow the ice packs or bags to directly touch the skin.
- What will happen if you apply ice for a prolonged duration?
- It may reduce or decrease excessive blood flow into the applied area.
- It will cause skin burns because the nerves present under the area will get damaged.
- In which conditions you can not apply ice therapy? Or Contraindications of ice therapy :
- The patient was diagnosed with Raynaud’s syndrome.
- Diabetic patients
- Patients having urticaria from the cold application.
- Paroxysmal cold hemoglobinuria
- Circulatory insufficiency is already present.
- Hypersensitivity from cold.
Compression:
- It is given with the help of elastic bandages, by wrapping the bandage around the injured area.
- Elastic bandages should provide comfortable compression force without causing pain and constriction of blood vessels.
- It should not be too loose or too tight.
- It is important to wrap it from the distal to the affected area and then move in a proximal direction.
- Method of application :
- The figure of eight method:
- If you find that skin below the wrapped area changes its color like blue or you feel cold, numb, or tingling kind of sensations in
- your affected extremity so you need to lose your bandage immediately.
- If symptoms do not get normal, then take medical help.
- Because when it will be too tight, it will interrupt your normal blood flow.
- What are the benefits of compression?
- It will keep the swelling or edema under control by the pressure of elastic bandages.
- It will also help to provide support to the affected extremity or area.
- It will help to reduce the loss of blood flow from the damaged tissue.
- Will also reduce the further accumulation of the swelling or edema in surrounding structures as well as the affected areas.
- Procedure:
- After injury giving compression for at least one week will be more effective to reduce the amount of swelling.
- Wrap your bandage tight enough only to support your injured area.
- Apply it from distal to proximal direction.
- Apply it like that it should stop the blood flow from injured blood vessels.
Elevation:
- Here you need to elevate your injured area.
- Keeping the affected area elevated, will reduce the amount of swelling or edema for sure.
- For lower limb injuries, you need to elevate your affected extremity above the level of the pelvis.
- What are the Physiological effects of elevation?
- It will prevent further swelling by increasing the venous return.
- It will also help to reduce hydro-static pressure.
- It will increase the amount of removal of waste materials from the site of injury.
- Will also help to reduce pain and discomfort associated with soft tissue injuries.
- What are the uses of elevation?
- By elevation of the injured area, it will make the difficulty for blood to reach up to that area.
- So there will be a reduction in loss of blood flow.
- After the injury, it is best to elevate the area for 2 to 3 hours a day.
When RICE Principle is not effective?
- It is not effective to treat cases of fractures.
- If you have more serious soft tissue injuries.
- These kinds of conditions may require :
- Medications
- Physical therapy Treatment or
- Surgical interventions.
Detailed Physiotherapy Treatment:
- It is divided into 3 phases:
- Maximum protection phase: First three weeks
- Moderate protection phase: Three to six weeks
- Minimal protection phase: up to eight weeks
Physiotherapy Treatment in maximum protection phase:
- It is the most important phase for the healing of injured tissues.
- it lasts up to three weeks.
Goals of maximum protection phase:
- To decrease the amount of pain
- To decrease present joint swelling
- To protect healing tissues
- To prevent reflex inhibition of muscles surrounding the affected joint.
Treatment protocol:
The use of the PRICE Protocol will help in the protection of healing tissues, and reduction in the amount of swelling and pain.
it is described below in detail.
What is the full form of PRICE?
OR
Price stands for:
- P stands for : Protection
- R stands for : Rest
- I stands for : Ice
- C stands for : Compression
- E stands for : Elevation
Protection:
- Protecting the injured area from further injury is a key to treatment.
- In this phase, the use of support is recommended.
- Ex: By using crutches to protect the lower limb from injuries.
- It is important to protect the injured area to avoid further tissue damage.
- For an example :
- If you hurt your knee while playing cricket, so you need to stop playing cricket to protect your injured area.
- Protection also helps to give the appropriate amount of rest for the healing process.
Rest:
- It is recommended to avoid or stop the use of injured or affected body parts.
- Here are a few benefits of resting position:
- Because of the resting position, the injured or affected body part will remain in the immobilization position.
- So it will prevent further injuries.
- And it will also provide time for early recovery or healing process of damaged soft tissue.
- How can give the resting position to the affected area?
- With the help of the following devices, you can give a resting position.
- Splints
- Braces
- Canes
- Crutches
- According to the area involved you can prescribe the device.
Ice:
- It is also known as ‘ Cryotherapy ‘
- Application of cold will reduce pain by making the affected area numb.
- What type of physiological effects can be seen after the application of cold?
- Cold reduces Tissue metabolism.
- So by this phenomenon, there will be constriction of the blood vessels.
- The application of ice will also decrease the nociceptive propagation of stimulus to the brain.
- Which will reduce pain sensations.
- It will also help to reduce muscle spasms occurred because of soft tissue injury.
- You can apply ice with the help of the following:
- Ice packs
- Ice bags
- Before application of ice packs or ice bags, wrap them in a cloth or towel whatever is available.
- It will help to prevent frostbite. so before applying make sure it does not touch the skin directly.
- In emergency situations, you can also use ice bags of frozen vegetables.
- What is the procedure for the application of ice?
- Apply ice over the injured area for approximately 10 to 15 minutes.
- or for 4 to 8 times in a while day.
- It will definitely help if you will apply it within the first 3 to 4 days of injury.
- Always remember that never allow the ice packs or bags to directly touch the skin.
- What will happen if you apply ice for a prolonged duration?
- It may reduce or decrease excessive blood flow into the applied area.
- It will cause skin burns because the nerves present under the area will get damaged.
- In which conditions you can not apply ice therapy?
- or Contraindications of ice therapy:
- The patient was diagnosed with Raynaud’s syndrome.
- Diabetic patients
- Patients having urticaria from the cold application.
- Paroxysmal cold hemoglobinuria
- Circulatory insufficiency is already present.
- Hypersensitivity from cold.
Compression:
- It is given with the help of elastic bandages, by wrapping the bandage around the injured area.
- Elastic bandages should provide comfortable compression force without causing pain and constriction of blood vessels.
- It should not be too loose or too tight.
- It is important to wrap it from the distal to the affected area and then move in a proximal direction.
- Method of application:
- The figure of eight method.
- If you find that skin below the wrapped area changes its color like blue or you feel cold, numb or tingling kind of sensations in your affected extremity so you need to lose your bandage immediately.
- If symptoms do not get normal, then take medical help.
- Because when it will be too tight, it will interrupt your normal blood flow.
- What are the benefits of compression?
- It will keep the swelling or edema under control by the pressure of elastic bandages.
- It will also help to provide support to the affected extremity or area.
- It will help to reduce the loss of blood flow from the damaged tissue.
- Will also reduce the further accumulation of the swelling or edema in surrounding structures as well as the affected area.
- Procedure:
- After injury giving compression for at least one week will be more effective to reduce the amount of swelling.
- Wrap your bandage tight enough only to support your injured area.
- Apply it from distal to proximal direction.
- Apply it like that it should stop the blood flow from injured blood vessels.
Elevation:
- Here you need to elevate your injured area.
- Keeping the affected area elevated, will reduce the amount of swelling or edema for sure.
- For lower limb injuries, you need to elevate your affected extremity above the level of the pelvis.
- What are the Physiological effects of elevation?
- It will prevent further swelling by increasing the venous return.
- It will also help to reduce hydrostatic pressure.
- It will increase the amount of removal of waste materials from the site of injury.
- Will also help to reduce pain and discomfort associated with soft tissue injuries.
- What are the uses of elevation?
- By elevation of the injured area, it will make the difficulty for blood to reach up to that area.
- So there will be a reduction in loss of blood flow.
- After the injury, it is best to elevate the area for 2 to 3 hours a day.
Exercise:
- Exercises should be started after some amount of pain and swelling is subsided by PRICE protocol.
- Initiation of Passive or active-assisted ROM exercises of the knee within the limit of pain.
- Knee flexion exercises or Knee bending
- Knee extension exercises or Heel slides
- Straight leg raising exercise
- Patellar Mobilization :
- Apply Grade-1 and Grade-2 only
- Patellar glides: Superior, Inferior, Medial, and Lateral within the limit of pain.
- Initiate Muscle setting exercises in the range most comfortable for the patient.
- for quadriceps muscles, hamstring muscles, and hip adductor muscles.
- Teach safe Transfer activities to avoid pivoting on the injured knee.
- Walking with the help of assistive devices is initiated, but weight-bearing is as tolerated by the patient.
Physiotherapy Treatment in moderate protection phase:
- It lasts up to three to six weeks.
Goals of moderate protection phase:
- To achieve a full and pain-free range of motion for affected joint
- To restore muscular strength
- To normalize gait without an assistive device
- To normalize the patient’s functional activities
Treatment protocol:
- Protective bracing in weight-bearing and improve overall joint mobility:
- Bracing is important in weight-bearing because it decreases stress on the healing ligament, and also provides stability.
- To improve joint mobility use supine wall slide exercise.
- Patellar mobilization Grade-3 can also be used.
- use a stationary cycle to improve the range of motion.
- Improve overall muscle performance by following:
- isometric quadriceps contractions
- and isometric hamstring contractions increase the number of repetitions.
- initiate open-chain exercises for quadriceps because it is important for the stability of the joint.
- start closed chain exercises like partial squats, step-ups, leg presses, and heel raises.
- Improve neuromuscular control by following:
- begin with low-intensity single plane movements and progress to high-intensity multiplane movements.
- improve balance activities by reach outs in multiple directions in a standing position.
Physiotherapy Treatment in minimum protection phase:
- It lasts up to mostly five to eight weeks.
Goals of minimum protection phase:
- To increase strength
- To improve muscle power
- To increase muscular endurance
- To improve neuromuscular control
- To improve the dynamic stability of the affected joint
Treatment protocol:
- Continue progressing lower extremity flexibility exercises
- advance the level of progressive resisted exercises according to the patient’s level of strength.
- Progress closed chain exercises.
- improve balance activities by reach outs in multiple directions, with standing or one leg standing.
Surgical Treatment: An Anterior Cruciate Ligament Reconstruction
- If conservative treatment is not affected, so your doctor may recommend you for surgical procedures.
What are the indications of surgery?
- Disabling instability of knee due to ACL deficiency caused by a complete or partial acute tear or chronic laxity.
- Frequent episodes of knee-buckling during routine activities.
- Significantly impaired dynamic knee stability.
- If rotatory instability of the joint is present.
- A grade 3 ACL sprain always requires surgery.
- If You are an athlete and want to continue your sport, and if your sport involves activities like jumping, cutting, or pivoting.
- If more than one ligament is injured you may require surgery.
- You have a torn meniscus that requires repair.
The surgical procedure an overview:
- Your surgeon will remove your damaged or torn ligament and will replace it with a segment of the tendon.
- This process of replacement of tissue is called the graft.
- It is taken from another part of your knee or a tendon or it can also take from another doner but before being checked correctly.
- Your surgeon will drill implants according to your need into your thighbone and shinbone for the perfect implantation position of the graft.
- After that, your surgeon will secure your bones with screws or other devices.
- The replaced graft will serve as the surface area on which new ligament tissue can grow.
Postoperative physiotherapy treatment plan:
- It is again divided into three phases:
- The Maximum protection phase
- The Moderate protection phase
- The Minimum protection phase
All these phases of rehabilitation or physiotherapy treatment are described below in detail:
The Maximum protection phase :
- Overview:
- It lasts up from postoperative day 1 to four weeks.
- In this phase patient is having common complaints of the following:
- Pain
- Hemarthrosis
- joint effusion is present
- Decreased ROM of the affected knee
- Decreased muscle strength
Goals during Maximum protection phase:
- To protect healing tissues
- To prevent reflex inhibition of muscles
- To decrease joint effusion
- To increase the range of motion of the affected joint
- To make the patient able to walk with an assistive device
Treatment plan:
- Ankle pumping exercises:
- perform the exercise throughout the day to reduce the risk of Deep vein thrombosis(DVT).
- Begin muscle setting exercises for the following muscles:
- Quadriceps, Hamstrings, Hip muscles
- Initiate isometric quadriceps contraction
- Repeat it 4 to 5 times a day.
- Straight leg raising exercise
- Perform initially active-assisted or with the help of your therapist.
- When knee movement is permissible, initiate low-intensity multiple angle isometric exercise.
- Initiate supine heel slides at the comfortable level of hip and knee flexion.
- Initiate Passive or active-assisted range of motion of knee joint.
- Include patellar mobilization to prevent adhesions.
- initially grade 1 and 2 only.
- To increase passive knee extension give the patient a long sitting position and prop his /her heel on a rolled towel with a knee unsupported.
- initiate trunk and lower extremity stabilization exercises.
- do stretching of hip and ankle muscles.
- Initiate stabilization exercises with first bilateral support and then in progression with unilateral support.
- progress training with weight-shifting activities.
Criteria to progress to the next phase:
- If the patient fulfills the following criteria, then you can go for the next phase treatment plan.
- Minimal pain and swelling
- Full active knee extension
- Up to 110-degree knee flexion
- 50% to 60% of the strength of quadriceps muscles
- No evidence of excessive joint laxity
The Moderate protection phase:
- Overview:
- It lasts up to 4 weeks to 10 weeks.
- The patient is having the following presentation:
- Pain is controlled
- Joint effusion is also controlled
- Near full or full knee ROM is achieved
- Good muscular strength up to 3 grade.
Goals of Moderate protection phase:
- To achieve full pain-free knee ROM
- To increase muscle strength
- To improve dynamic control of the knee
- To normalize gait pattern and ADL function
Treatment plan:
- Continue low-intensity end range self-stretching to gain full knee ROM.
- Use grade-3 joint mobilization techniques to restore full knee flexion.
- continue flexibility exercises for hams, IT band, and plantar flexor muscles.
- continue closed chain exercises against bodyweight resistance.
- ex: Bridging, wall slides, partial squats,straight-line lunges, step-ups and downs, heel raises.
- progress from double-leg to single-leg exercises.
- progress neuromuscular training with stabilization and static and dynamic balance activities.
- practice ambulation with or without a protective brace but without crutches.
- Try to re-establish a normal gait pattern.
Criteria to progress to the next phase:
- Absence of joint effusion and pain.
- Full knee range of motion (ROM)
- At least 75% of quadriceps strength is achieved
- Knee joint instability is not seen during independent walking.
The Minimum protection phase:
- Overview:
- It lasts up to 11 weeks to 24 weeks mostly.
- The patient is having the following presentation:
- no joint instability is seen
- no pain no swelling is present
- achieved full knee ROM
- Symmetrical gait pattern
- No restriction is seen in ADLs
Goals of Minimum protection phase:
- To increase muscle strength, endurance, and power
- To improve neuromuscular control, dynamic stability, and balance
- To regain cardiopulmonary endurance
- To regain the ability to perform functional activities
- To reduce the risk of reinjury
Treatment plan:
- Advance level of closed chain strengthening exercises
- ex: Lunges, step-ups, and downs against elastic resistance
- Advance neuromuscular, balance, and agility training with directional changes.
- For cardiopulmonary endurance perform the following activities:
- Stationary cycling increase duration and speed
- walking and running program
- treadmill walking
- Advice to avoid re-injury:
- A functional knee brace may be worn to reduce the risk of reinjury during specific activities, particularly those involving activities like turning, twisting, cutting, or jumping motions.
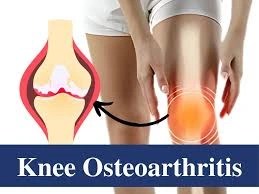
What are the Complications of an ACL Injury?
- Patients may have a higher risk of developing osteoarthritis of an injured knee.
- There are chances that your arthritis may occur even if you have surgery to reconstruct the ligament.